Max. measurement range
- 25 mm
Temperature range
- Ambient temperature
- Up to 250°C
Material
- Metals
- Plastics
- Fiber-reinforced composites
Strain gauge clip-on extensometer
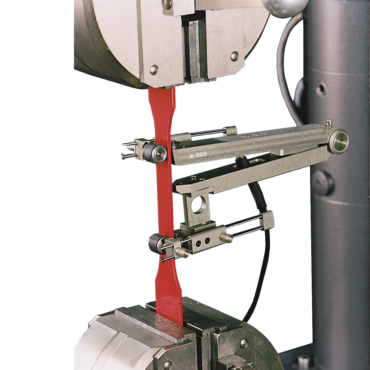
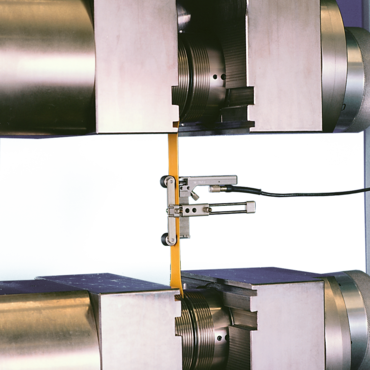
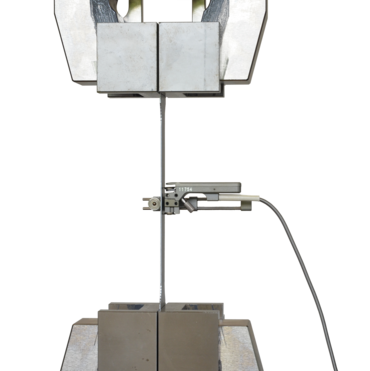
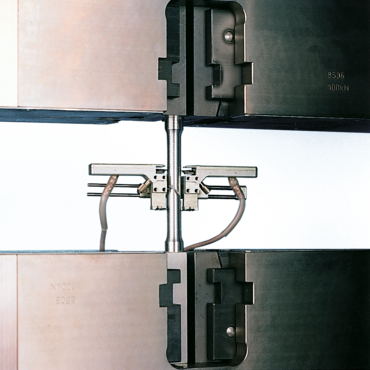
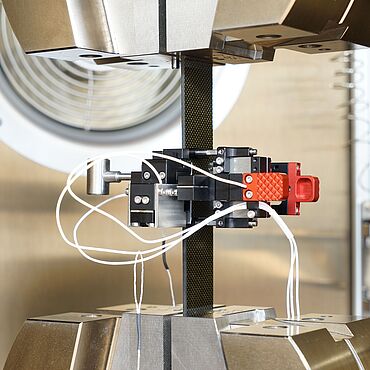
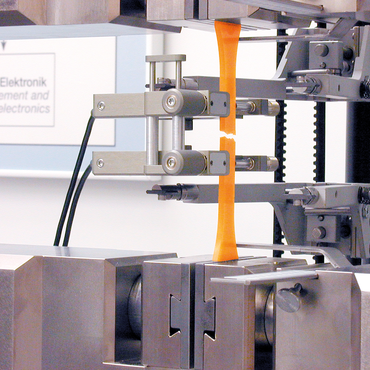
Strain gauge clip-on extensometers are manual clip-on extensometers, that are clamped to the specimen. With various preset gauge-lengths they are suitable for use on metal and plastic specimens.
- Measuring systems possess excellent linearity, providing reliable test results.
- Lightweight, miniaturized construction, ideal for short specimens.
Advantages & features
- Excellent linearity for reliable test results.
- High resolutions enable measurement of very small deformations during test.
- Lightweight, miniaturized construction, ideal for specimens with small parallel length.
- Initial gauge length can optionally be reset from 10 to up to 100 mm using extension pieces (does not apply to Type DMS Length 1).
- Temperature-resistant measurement systems for use from -50°C to +200°C.
- Extensometers for two-sided measurement of specimen deformation, enabling exact determination of Young's modulus and engineering elastic limit.
- Variable measurement options are possible on extensometers with 2 separate measurement systems; individual signals or mean-value signal can be displayed.
- While attached to the specimen the extensometer is prevented by limit stops from exceeding the measurement travel and protected in the event of specimen break (Type DMS Length 1 only).
Extension measurement in pictures
Technical overview
| Description | Value | |
| Type | Strain gauge length 1 | |
| Item No. | 057808 | |
| Measuring system | Single-sided strain gauge system | |
| Initial gauge length | 25 | mm |
| Modifiable to | 50 | mm |
| Measurement travel | ||
| Tensile | 25 | mm |
| Compression | - | mm |
| Specimen dimensions, max. | ||
| Round specimen, Ø | 28 | mm |
| For flat specimens (d x w) | 28 x 30 | mm |
| Specimen dimensions, min. | ||
| Round specimen, Ø | 1 | mm |
| For flat specimens (d x w) | 1 x 1 | mm |
| Accuracy to EN ISO 9513 | Class 0.5 | |
| Weight | 95 | g |
| Mounted height | Gauge length + 2 | mm |
| Number of sensors | 1 | |
| Type of output signal | Individual signal | |
| Ambient temperature | > 0 ... +60 | °C |
| Factory calibration | 21 | °C |
| Description | Value | |
| Type | Strain gauge length 2 | |
| Item No. | 057809 | |
| Measuring system | Single-sided strain gauge system | |
| Initial gauge length | 20 | mm |
| Modifiable to | 10 | mm |
| Measurement travel | ||
| Tensile | 2 | mm |
| Compression | 1 | mm |
| Specimen dimensions, max. | ||
| Round specimen, Ø | 25 | mm |
| For flat specimens (d x w) | 25 x 25 | mm |
| Specimen dimensions, min. | ||
| Round specimen, Ø | 1 | mm |
| For flat specimens (d x w) | 1 x 1 | mm |
| Accuracy to EN ISO 9513 | Class 0.5 | |
| Weight | 45 | g |
| Mounted height | 24 | mm |
| Number of sensors | 1 | |
| Type of output signal | Individual signal | |
| Ambient temperature | > 0 ... +60 | °C |
| Factory calibration | 21 | °C |
| Description | Value | |
| Type | Strain gauge length 3 | |
| Item No. | 057810 | |
| Measuring system | Single-sided strain gauge system | |
| Initial gauge length | 20 | mm |
| Modifiable to | 10 | mm |
| Measurement travel | ||
| Tensile | 2 | mm |
| Compression | 1 | mm |
| Specimen dimensions, max. | ||
| Round specimen, Ø | 25 | mm |
| For flat specimens (d x w) | 25 x 25 | mm |
| Specimen dimensions, min. | ||
| Round specimen, Ø | 1 | mm |
| For flat specimens (d x w) | 1 x 1 | mm |
| Accuracy to EN ISO 9513 | Class 0.5 | |
| Weight | 45 / 70 | g |
| Mounted height | 24 | mm |
| Number of sensors | 1 | |
| Type of output signal | Individual signal | |
| Ambient temperature | -50 ... +200 | °C |
| Factory calibration | 21 | °C |
| Description | Value | |
| Type | Strain gauge length 4 | |
| Item No. | 057811 | |
| Accuracy to EN ISO 9513 | Class 0.5 | |
| Factory calibration | 21 | °C |
| Measuring system | Two-sided strain gauge system | |
| Initial gauge length | 20 | mm |
| Modifiable to | 10 | mm |
| Measurement travel | ||
| Tensile | 2 | mm |
| Compression | 1 | mm |
| Specimen dimensions, max. | ||
| Round specimen, Ø | 25 | mm |
| For flat specimens (d x w) | 25 x 25 | mm |
| Specimen dimensions, min. | ||
| Round specimen, Ø | 1 | mm |
| For flat specimens (d x w) | 1 x 1 | mm |
| Mounted height | 24 | mm |
| Number of sensors | 2 | |
| Type of output signal | Mean value | |
| Ambient temperature | -50 ... +200 | °C |
| Weight | 70 | g |
| Description | Value | |
| Type | Strain gauge length 5 | |
| Item No. | 0568931 | |
| Measuring system | Two-sided strain gauge system | |
| Initial gauge length | 10 | mm |
| Modifiable to | - | mm |
| Measurement travel | ||
| Tensile | 1.5 | mm |
| Compression | 1.5 | mm |
| Specimen dimensions, max. | ||
| Round specimen, Ø | 25 | mm |
| For flat specimens (d x w) | 25 x 25 | mm |
| Specimen dimensions, min. | ||
| Round specimen, Ø | 1 | mm |
| For flat specimens (d x w) | 1 x 1 | mm |
| Accuracy to EN ISO 9513 | Class 0.5 | |
| Weight | 70 | g |
| Mounted height | 14 | mm |
| Number of sensors | 2 | |
| Type of output signal | Individual signal | |
| Ambient temperature | -50 ... +200 | °C |
| Factory calibration | 21 | °C |
- USC or DCSC module 2x required
| Type | Clip-on extensometer 2002-2 | |
| Item No. | 10422071 | |
| Measuring system | Two-sided strain gauge system | |
| Initial gauge length | 20 | mm |
| Modifiable to | 10 | mm |
| Measurement travel | ||
| Tensile | 2 | mm |
| Compression | 1 | mm |
| Specimen dimensions, max. | ||
| Round specimen, Ø | 25 | mm |
| For flat specimens (d x w) | 25 x 25 | mm |
| Specimen dimensions, min. | ||
| Round specimen, Ø | 1 | mm |
| For flat specimens (d x w) | 1 x 1 | mm |
| Measurement value resolution | Depends on machine electronics, see machine electronics resolution | |
| Accuracy to EN ISO 9513 | Class 0.5 | |
| Weight | 70 | g |
| Mounted height | 24 | mm |
| Number of sensors | 2 | |
| Type of output signal | Individual signal | |
| Factory calibration | 21 | °C |
| Ambient temperature | -50 ... +200 | °C |
- USC or DCSC module 2x required
Transverse strain extensometer for AllroundLine and zwickiLine testing systems
| Type | Strain gauge width | |
| Item No. | 057813 | |
| Measurement width | 20.5 ... 16.5 (convertible) | mm |
| Measurement travel | 4 | mm |
| Specimen thickness | 0.4 ... 6 (steel) | mm |
| Installation height | 60 | mm |
| Measurement value resolution | Depends on machine electronics, see machine electronics resolution | |
| Accuracy | Class 0.5 | to EN ISO 9513 |
USC or DCSC module required !
| Type | Biax 2501-2 clip-on extensometer | |
| Item No. | 10449601 | |
| Measuring system | double-sided strain-gauge system | |
| Measurement travel | ||
| tensile | 1.2 | mm |
| compression | 0.5 | mm |
| Measurement travel for change in width | ±0.5 | mm |
| Initial gauge length L0 | 25 | mm |
| Specimen dimensions | ||
| round specimen (Ø) | up to 38 | mm |
| flat specimen width, max. | 60 | mm |
| flat specimen thickness, max. | 34 | mm |
| Measured-value resolution | depends on machine electronics, see machine electronics resolution | |
| Accuracy to EN ISO 9513 | ||
| -55 ... +100 °C | Class 0.5 | |
| -70 ... +175 °C | Class 1 | |
| Ambient temperature | -70 ... +175 | °C |
| Overall height | 39 | mm |
| Approx. weight | 200 | g |
| Number of sensors | 3 | |
| Type of output signal (extension) | Mean value | |
| Type of output signal (change in width) | Single signal | |
- 2 x USC module required
