videoXtens biax 2-150 HP and videoXtens 2-150 HP
The extensometer for high-accuracy measurement on composites and plastics, including biaxial Download- 175 mm
- -55°C ... +360°C
- Tensile, compression, flexure tests
- Cyclic tests
- Plastics
- Fiber-reinforced composites
2-150 HP and videoXtens videoXtens biax 2-150 HP applications
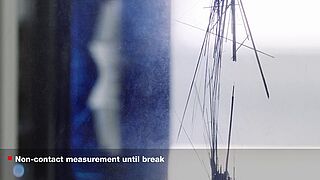
An extensometer for everything: from determination of the tensile modulus and Poisson’s ratio to specimen break, and for testing at ambient temperature as well as in a temperature chamber. These non-contact, optical video extensometers were specially designed for tests on fiber-reinforced composites and plastics. In addition, they can measure completely without gauge marks, for example on specimens that display a surface structure, such as CFRP specimens.
- The videoXtens 2-150 HP and the videoXtens biax 2-150 HP feature our patented array technology for high-accuracy testing in a wide measurement range.
- The videoXtens biax 2-150 HP additionally includes a camera for change in width measurement. This makes the videoXtens biax 2-150 HP is a unique optical strain measurement system that determines the tensile modulus and Poisson’s ratio in accordance with ISO 527 with an accuracy never before achieved by non-contact extensometers. This accuracy is also achieved under temperature in the ZwickRoell temperature chamber. It therefore far exceeds the requirements of accuracy class 0.5 according to ISO 9513.
| Standard | Type of test | Special characteristic values |
|---|---|---|
| Tensile tests on plastics |
| |
| Tensile tests on filament strands and laminates made of fiber-reinforced composites |
|
| In-plane shear tests (±45° method) |
| |
| Iosipescu test and v-notch rail shear test on laminates |
| |
| 3- and 4-point flexure tests |
|
Additional videoXtens advantages & features
The videoXtens offers additional advantages & features. All general advantages and even more information on the ZwickRoell videoXtens systems can be found here.
Change in width measurement / transverse strain measurement
The videoXtens biax 2-150 HP has an additional camera integrated in the housing for high-precision measurement of the change in width; the videoXtens is designed for biaxial measurement. The change in width is measured directly at the edge of the specimen, without contact and without gauge marks. The number of measuring points can be freely selected. The values are automatically averaged, but can also be evaluated individually.
Since the additional camera is specially designed for measuring the change in width, the videoXtens also performs this measurement with high precision. It fulfills accuracy class 0.5 (ISO 9513) also for the change in width measurement and determines the Poisson's ratio according to ISO 527 with an unprecedented accuracy for non-contact extensometers.
2D Digital Image Correlation (DIC)
2D digital image correlation visualizes deformations and strain over the entire visible specimen surface. This software option considerably expands the analysis options of the videoXtens. Activation is very simple, you only need a software license. The live strain measurement and subsequent 2D DIC analysis are performed with the same videoXtens and using the same marker.
A wide range of analysis tools provide different types of information: Gauge lengths, measuring points, virtual strain gauges, cutting lines, vector maps and more. Here you will find detailed information about 2D DIC.
Flexure test: deflection measurement
The videoXtens offers different options to measure deflection. A measuring plunger is often placed under the specimen for comparability with measurements using sensors or transducers. The measurement displacement during the test is measured by videoXtens using stick-on gauge marks.
Alternatively, it is also possible to measure directly on the specimen edge: either by applying a mark to the flexure specimen or by using a backlight behind the specimen, which makes the lower edge of the specimen visible and measurable for the videoXtens. In addition to the deflection in the test axis, the polynomial approximation of the curvature can also be determined.
Test Re-Run: re-calculate instead of re-testing
The test re-run function can be used to virtually repeat and recalculate the test with a modified initial gauge length. You save time on specimen preparation and testing and can run different evaluations on one and the same specimen.
During the test, the testing software records the image series. You can later use these to change the size and position of the initial gauge length as required. One click starts the recalculation and all characteristic values are recalculated on the basis of the new gauge length. Each recalculation is displayed separately, making comparisons simple and clear.
Strain distribution: every specimen counts
A break outside the gauge length causes costs and additional time for specimen preparation and retesting. This can be prevented with the strain distribution option.
During the test, the testing software automatically places the gauge length symmetrically around the break point.
The workaround offered by ISO 6892-1 in Annex I to validate breaks outside the gauge length is also activated effortlessly by our software; calculation and validation according to standard specifications run automatically and in real time. No need to manually measure and recalculate the specimen as was the case before.
2D dot matrix
Up to 100 measuring points can be set and measured in any arrangement or in the form of a grid. In this way, local strains and inhomogeneities of a specimen under load are determined. X and Y coordinates as well as the distances between dots are available as measured values.
The measured values can be easily exported or displayed as channels directly in testXpert. The prerequisite is that all measuring points are applied to a flat specimen surface, as this is a two-dimensional measurement. Typical applications includes tests on components or multiaxial tensile tests.

