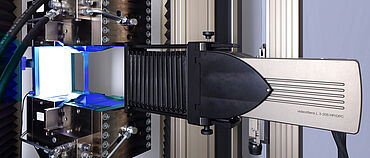
videoXtens L 3-205 HP/OPC
The metals specialist: reliable, automatic measurement where every specimen counts Download- 240 mm
- -70°C ... +360°C
- Tensile, compression, flexure tests
- Metals
Reliable, time-saving and contact-free measurement
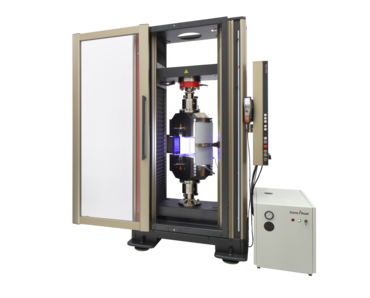
This video extensometer was specifically developed for metals applications. The videoXtens L 3-205 HP/OPC offers functions that make metals testing more efficient. Key features are:
- Mark-free measurement that saves the time otherwise spent on marking the specimen,
- the virtual setting of the gauge length around the break, thus avoiding repeat tests and
- out-of-plane compensation, which eliminates distortions in the measurement curve caused by specimen bending.
The new standard for simply precision measurement
Measuring without gauge marks
The videoXtens can also measure metal specimens without time-consuming marking. This saves specimen preparation time. Oily surfaces or scale are also not an issue.
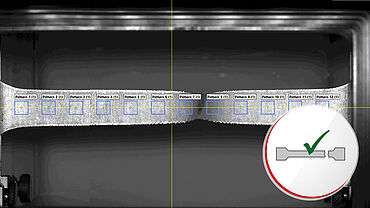
The blue contrast light technology transfers the natural roughness of the specimen surface into a high-contrast pattern. Virtual gauge marks are then conveniently placed on the specimen image using the testing software. The virtual gauge marks mark a small area, the pattern within this area is used as a measurement marker and tracked.
Strain distribution: every specimen counts
A break outside the gauge length causes costs and additional time for specimen preparation and retesting. This can be prevented with the strain distribution option.
During the test, the testing software automatically places the gauge length symmetrically around the break point.
The workaround offered by ISO 6892-1 in Annex I to validate breaks outside the gauge length is also activated effortlessly by our software; calculation and validation according to standard specifications run automatically and in real time. No need to manually measure and recalculate the specimen as was the case before.
Out-of-plane compensation
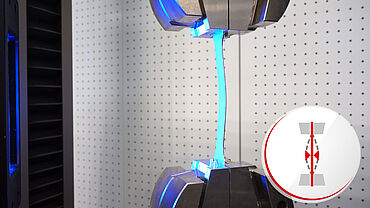
Reliable test results, even in the event of lateral specimen movement, thanks to out of - plane compensation:
Due to perspective imaging, out-of-plane movement of a specimen in the initial measuring range results in apparent strain and thus in measurement error. Using ZwickRoell array technology, the displacement of a measuring point is taken into account using several cameras whereby the out-of-plane displacement is determined. The measured axial strain is automatically compensated. This reduces the variance in the determined gradient of the elastic slope line and thus ensures reliable test results.
Additional videoXtens advantages & features
Of course, all the general advantages of videoXtens systems also apply to the videoXtens L 3-205 HP/OPC.
Typical applications
| Standard | Test results | Special feature |
|---|---|---|
| Yield point, offset yield, tensile strength, strain at break | Meets all requirements for the test speed according to the standard, including the closed loop strain rate control method | |
| Vertical anisotropy / r-value | Also measurement over the entire gauge length according to the recommendation of ISO 10113:2020 |
| Hardening exponent / n-value | Mark-free, axial strain measurement |
Take advantage of ZwickRoell’s innovative technologies:
| ZwickRoell technology | Benefits |
|---|---|
| Out-of-plane compensation | Correct measured values right from the start and low scatter |
| Array technology | In addition to the wide measurement range (up to 240 mm) you benefit from high resolution (0.2 µm) |
| Blue contrast light technology | Mark-free measurement saves time and costs otherwise spent during specimen preparation |
| Strain distribution | Every specimen counts, the break is always within the gauge length |
| Closed loop strain rate control to ISO 6892-1 method A1 within a narrow tolerance range | Low scatter of values and reproducible test results, as all values are determined at the exact and traceable strain rate |
| Special camera and algorithm for change in width measurement | Higher accuracy: accuracy class 0.5 (ISO 9513) for change in width measurement |
| Change in width measurement over the entire gauge length | Lower scatter of r-values, which is also why this method is a recommended by ISO 10113:2020 |
Change in width measurement / transverse strain measurement
This option is used for biaxial measurements: One or more transverse strain measurements are recorded at the same time as the longitudinal strain measurement, for example the change in width directly at the edge of the specimen, contact-free and without gauge marks. The number of measuring points can be freely selected. The values are automatically averaged, but can also be evaluated individually.
To measure the change in width and especially to determine the r-value, we recommend the transverse strain hardware option, in which an additional camera is integrated directly into the housing of the videoXtens. This camera is specially designed for the change in width, fulfills accuracy class 0.5 (ISO 9513) and achieves significantly more accurate measured values than the software-only option.
The system also includes the measurement of the change in width over the entire gauge length in accordance with the new ISO 10113:2020 recommendation.
2D Digital Image Correlation (DIC)
2D digital image correlation visualizes deformations and strain over the entire visible specimen surface. This software option considerably expands the analysis options of the videoXtens. Activation is very simple, you only need a software license. The live strain measurement and subsequent 2D DIC analysis are performed with the same videoXtens and using the same marker.
A wide range of analysis tools provide different types of information: Gauge lengths, measuring points, virtual strain gauges, cutting lines, vector maps and more. Here you will find detailed information about 2D DIC.
2D dot matrix
Up to 100 measuring points can be set and measured in any arrangement or in the form of a grid. In this way, local strains and inhomogeneities of a specimen under load are determined. X and Y coordinates as well as the distances between dots are available as measured values.
The measured values can be easily exported or displayed as channels directly in testXpert. The prerequisite is that all measuring points are applied to a flat specimen surface, as this is a two-dimensional measurement. Typical applications includes tests on components or multiaxial tensile tests.
Flexure test: deflection measurement
The videoXtens offers different options to measure deflection. A measuring plunger is often placed under the specimen for comparability with measurements using sensors or transducers. The measurement displacement during the test is measured by videoXtens using stick-on gauge marks.
Alternatively, it is also possible to measure directly on the specimen edge: either by applying a mark to the flexure specimen or by using a backlight behind the specimen, which makes the lower edge of the specimen visible and measurable for the videoXtens. In addition to the deflection in the test axis, the polynomial approximation of the curvature can also be determined.

