Testing of Thin Sheet
Thin sheets and foils are the last stage in the production of flat products. Thin sheets are between 0.35 and 3.0 mm thick, whereas foils are typically less than 60 μm. Ultra-thin sheets complete the thickness range. Applications for these flat products are extremely diverse and therefore widespread in all industries; accordingly, the range of tests on thin sheet is also extensive.
Tensile tests Hardness tests Deformation tests High-speed tensile test Automation
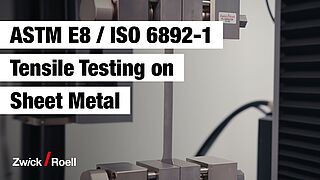
Simple tensile test on thin sheet metal
Thin sheets are frequently required to possess good ductility combined with high strength. For the characterization of material properties in tensile tests the international standard ISO 6892-1 and the American ASTM E8 standard are most commonly used.
Testing thin sheet metal according to ISO 6892 and ASTM E8 has never been this easy.
Our testing systems are designed for high specimen throughput and reliable test results. Your specimens are securely gripped without jaw breakage, and thanks to the easily reproducible initial gauge length, tests can be repeated quickly and reliably.
Are multiple operators running your tests? No problem! With smart step-by-step instructions, our testXpert testing software supports the user with setup and testing, as well as in the evaluation of the test results, turning precise and repeatable test results into child's play.
Your biggest advantages:
- All system configuration parameters are uploaded automatically through our standard test programs
- Cross-section measurements are fast and error-free
- Data is automatically transmitted to our testXpert testing software with 100% standard compliance
- Navigating the software is easy and saves both time and money
Tensile tests on thin metal sheets with r- and n-value determination
Tensile tests are often used to determine r- and n-values to characterize forming properties; the n-value describes the work hardening (increase in stress) during plastic deformation up to uniform elongation, while the r-value describes the vertical anisotropy. The n-value is determined from the tensile stress data and strain values; for the r-value the transverse strain on the tensile specimen is also measured during the test. The r-value is determined according to the international standard ISO 10113 and the American standard ASTM E517; the n-value is determined according to ISO 10275 and ASTM E646.
Tensile specimens are taken from the strip or sheet at set angles to the rolling direction, since the r-value is also dependent on the rolling direction. The parallel length is produced by milling or punching plus finishing. Strips are cut for foils and in some cases, specimens are punched. The specimen shape is selected depending on the aforementioned test methods.
Testing solutions for tensile tests on thin sheet
ZwickRoell offers various machines and devices for specimen production from different sheet metal thicknesses. For the determination of characteristic values from tensile tests, ZwickRoell offers a wide range of static materials testing machines. Our comprehensive portfolio of axial and transverse strain extensometers allows you to select the best combination in line with your requirements and testing conditions, for example, a laser for dimensionally stable sheet metals.
Hardness testing on thin metal sheets
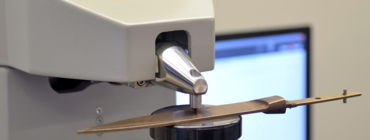
Hardness testing on thin metal sheets and coated metal sheets are performed to determine the surface hardness of the metal and coating. The hardness test is performed primarily for quality control in rolling and coating processes. Since these coatings are usually in the range of a few micrometers to a few tens of micrometers, hardness test methods with small residual indentation depths are mainly used here.
Small indention depths can be achieved with small test loads using the classic hardness testing methods to Vickers (DIN EN ISO 6507-1), Rockwell (DIN EN ISO 6508-1), and in particular, the Rockwell superficial scales, as well as to Brinell (DIN EN ISO 6506-1). The hardness test method to Martens is increasingly used for thin coatings. It is also known as an instrumented indentation test due to its precise measurement of the force-indentation depth curve; internationally it is known as IIT. The depth of the residual indention should not exceed 10% of the available sheet or coating thickness; if it does, the influence of the support or the substrate is no longer negligible. The instrumented indentation test has the advantage that even small indention or indention depths can be measured with greater accuracy and thus hardness values can be determined reliably and reproducibly.
Thin sheets are often cut to a specific size as defined by the customer and welded together with other sheet metals (tailored blanks), for example, according to the roller seam welding process (DIN EN ISO 4063). The quality of the welded seams are also tested using hardness testing methods. Typically micro-hardness testing methods to Vickers and Knoop, but also Martens (DIN EN ISO 6507-1, DIN EN ISO 4545-1, DIN EN ISO 14577-1) are used on cross-sections or on the surface of the welded seam and the area around it. Positions for single or multiple tests can be defined with absolute precision using instruments that test according to these methods.
Deformation tests on thin sheet
Good ductility properties are in great demand for thin sheet. Typical forming processes, such as deep drawing and stretch forming, are characterized in and tested using standard testing methods. ZwickRoell's BUP sheet metal testing machines test these properties with drawing forces up to 1,000 kN.
An important but complex test is the determination of the forming limit curve, from which designers can derive limit strains which should not be exceeded during forming processes. ZwickRoell works in close collaboration with qualified partners to develop the optical measurement technology required for recording strains during the drawing process.
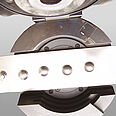
Draw bead test on thin sheet metal to VDA 230/201
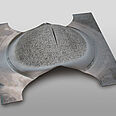
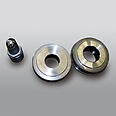
This test is designed to determine the coefficient of friction between a steel sheet and a deep drawing tool in order to determine the ideal lubricant for this forming process, thereby enabling cracks and creases to be avoided and ensuring an optimum deep drawing process. The draw bead unit can be easily installed in a standard testing machine.
For the test, a sheet metal strip with typical dimensions (300 mm x 30 mm x 2 mm) is axially gripped in the upper specimen grip and the draw bead tool is closed. The strip is then drawn through the draw bead tool. This procedure can be repeated automatically, with a variable number of repetitions. The digitally controlled clamping force of the draw bead tool guarantees accurate and reproducible test results. The tool die can be quickly interchanged to meet different testing specifications.
High-speed tensile tests on thin metal sheets
Material behavior at high strain rates is critical for applications in the automotive industry. Accidents involve high material deformation speeds which it is essential to take into account in automobile design. At ZwickRoell the necessary material properties are determined with high-speed tensile tests using high-speed testing machines of the HTM series. These servohydraulic testing machines achieve speeds of up to 20 m/s on specimens at forces up to 160 kN.
