Vibrophores
Download- Max. 1,000 kN
- Fatigue
- Fracture mechanics
- Tensile
- Compression
- DIN 50100
- ASTM E399
- ASTM E466
- ISO 6892
The vibrophore for static and dynamic tests
A vibrophore is a resonance testing machine that uses a mechanical resonator in connection with an electromagnetic drive. The dynamic load is generated by an oscillation system that works when the system operates at full resonance. The mean force is applied by moving the upper crosshead with the lead screw drive.
In the past, vibrophores were limited to dynamic materials testing (i.e. the determination of high cycle fatigue strength). With the newest generation of the vibrophore high-frequency fatigue testing machines, you can perform static tests at test forces up to 1,000 kN. The vibrophore’s electromagnetic drive delivers large force amplitudes with low energy input, so they work more efficiently than conventional instruments.
Typical applications for resonance testing systems are material fatigue tests and durability tests on standardized specimens and components (for example, piston rods, crankshafts, and screws), and production and quality control of components exposed to dynamic loads during their service life, such as concrete and reinforcing steel, as well as quasi-static tensile and compression tests and fracture mechanics tests on CT and SEB specimens.
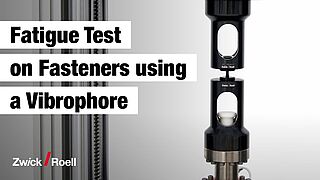
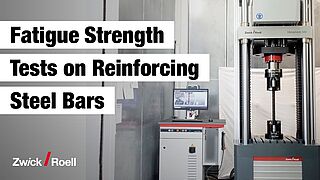
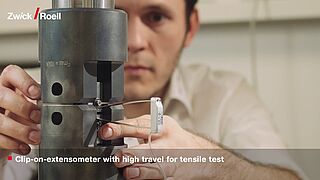
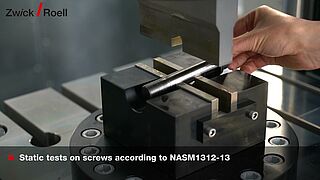
Videos: Vibrophores in operation
Technical overview
| Fmax | 15 | kN |
| Mean load, max. | ±15 | kN |
| Force amplitude, max. | ±7.5 | kN |
| Elastic specimen strain (oscillation displacement) max. | 6 (±3) | mm |
| Testing frequency range1 | 35 ... 300 | Hz |
| Number of frequency steps2 | 8 | |
| Number of guide columns | 4 | |
| Number of lead screws | 2 | |
| Frame stiffness at 1000mm crosshead separation3 | Approx. 170 | kN/mm |
| Drive | ||
| Static tests and for mean force control | AC drive | |
| Min. crosshead speed | 0.0001 | mm/min |
| Max. crosshead speed | 600 | mm/min |
| Crosshead return speed, max. | 1000 | mm/min |
| Positioning repeatability on crosshead | ±2 | µm |
| Motor holding brake | Yes | |
| Dynamic tests | Wear-free electromagnetic drive | |
| Dimensions, load frame | ||
| H4 – height | 2375 | mm |
| H3 – height of clamping table | 693 | mm |
| H2 – height of test area | 1200 | mm |
| H5 - height of test area including load cell | 1100 | mm |
| B2 – Width | 885 | mm |
| T3 – Depth | 645 | mm |
| T2 - Depth of base | 482 | mm |
| Weight, approx. | 1900 | kg |
| Test area dimensions | ||
| Test area height without load cell | 1200 | mm |
| Test area depth | 482 | mm |
| Width of clearance between columns | 6104 | mm |
| Machine frame travel, max. | 1099 | mm |
| Item No. | ||
| Vibrophore 15 including testControl II | 3007123 | |
| Optional: Two in one for static tests | 1028357 | |
| Optional: Oscillation displacement measurement | ||
- The testing frequency is determined using the stiffness and mass of the test arrangement.
- By activating/deactivating the weights
- Stiffness of the load frame: This value results from a direct measurement of deformation between the crossheads (moving crosshead and base crosshead) and does not take into account the deformation from drives and load cells.
- Without bellows
| Fmax | 25 | kN |
| Mean load, max. | ±25 | kN |
| Force amplitude, max. | ±12.5 | kN |
| Elastic specimen strain (oscillation displacement) max. | 6 (±3) | mm |
| Testing frequency range1 | 35 ... 300 | Hz |
| Number of frequency steps2 | 8 | |
| Number of guide columns | 4 | |
| Number of lead screws | 2 | |
| Frame stiffness at 1000mm crosshead separation3 | Approx. 170 | kN/mm |
| Drive | ||
| Static tests and for mean force control | AC drive | |
| Min. crosshead speed | 0.0001 | mm/min |
| Max. crosshead speed | 600 | mm/min |
| Crosshead return speed, max. | 1000 | mm/min |
| Positioning repeatability on crosshead | ±2 | µm |
| Motor holding brake | Yes | |
| Dynamic tests | Wear-free electromagnetic drive | |
| Dimensions, load frame | ||
| H4 – height | 2375 | mm |
| H3 – height of clamping table | 693 | mm |
| H2 – height of test area | 1200 | mm |
| H5 - height of test area including load cell | 1100 | mm |
| B2 – Width | 890 | mm |
| T3 – Depth | 645 | mm |
| T2 - Depth of base | 482 | mm |
| Weight, approx. | 1900 | kg |
| Test area dimensions | ||
| Test area height without load cell | 1200 | mm |
| Test area depth | 482 | mm |
| Width of clearance between columns | 6104 | mm |
| Machine frame travel, max. | 1099 | mm |
| Item No. | ||
| Vibrophore 25 including testControl II | 1050926 | |
| Optional: Two in one for static tests | 1028357 | |
| Optional: Oscillation displacement measurement | 1033236 | |
- The testing frequency is determined using the stiffness and mass of the test arrangement.
- By activating/deactivating the weights
- Stiffness of the load frame: This value results from a direct measurement of deformation between the crossheads (moving crosshead and base crosshead) and does not take into account the deformation from drives and load cells.
- Without bellows
| Fmax | 50 | kN |
| Mean load, max. | ±50 | kN |
| Force amplitude, max. | ±25 | kN |
| Elastic specimen strain (oscillation displacement) max. | 6 (±3) | mm |
| Testing frequency range1 | 35 ... 300 | Hz |
| Number of frequency steps2 | 8 | |
| Number of guide columns | 4 | |
| Number of lead screws | 2 | |
| Frame stiffness at 1000mm crosshead separation3 | Approx. 170 | kN/mm |
| Drive | ||
| Static tests and for mean force control | AC drive | |
| Min. crosshead speed | 0.0001 | mm/min |
| Max. crosshead speed | 600 | mm/min |
| Crosshead return speed, max. | 1000 | mm/min |
| Positioning repeatability on crosshead | ±2 | µm |
| Motor holding brake | Yes | |
| Dynamic tests | Wear-free electromagnetic drive | |
| Dimensions, load frame | ||
| H4 – height | 2375 | mm |
| H3 – height of clamping table | 693 | mm |
| H2 – height of test area | 1200 | mm |
| H5 - height of test area including load cell | 1100 | mm |
| B2 – Width | 890 | mm |
| T3 – Depth | 645 | mm |
| T2 - Depth of base | 482 | mm |
| Weight, approx. | 1900 | kg |
| Test area dimensions | ||
| Test area height without load cell | 1200 | mm |
| Test area depth | 482 | mm |
| Width of clearance between columns | 6104 | mm |
| Machine frame travel, max. | 1099 | mm |
| Item No. | ||
| Vibrophore 50 including testControl II | 1023099 | |
| Optional: Two in one for static tests | 1028360 | |
| Optional: Oscillation displacement measurement | 1033326 | |
- The testing frequency is determined using the stiffness and mass of the test arrangement.
- By activating/deactivating the weights
- Stiffness of the load frame: This value results from a direct measurement of deformation between the crossheads (moving crosshead and base crosshead) and does not take into account the deformation from drives and load cells.
- Without bellows
| Fmax | 100 | kN |
| Mean load, max. | ±100 | kN |
| Force amplitude, max. | ±50 | kN |
| Elastic specimen strain (oscillation displacement) max. | 6 (±3) | mm |
| Testing frequency range1 | 30 ... 285 | Hz |
| Number of frequency steps2 | 8 | |
| Number of guide columns | 4 | |
| Number of lead screws | 2 | |
| Frame stiffness at 1000mm crosshead separation3 | Approx. 380 | kN/mm |
| Drive | ||
| Static tests and for mean force control | AC drive | |
| Min. crosshead speed | 0.0001 | mm/min |
| Max. crosshead speed | 600 | mm/min |
| Crosshead return speed, max. | 1000 | mm/min |
| Positioning repeatability on crosshead | ±2 | µm |
| Motor holding brake | Yes | |
| Dynamic tests | Wear-free electromagnetic drive | |
| Dimensions, load frame | ||
| H4 – height | 2565 | mm |
| H3 – height of clamping table | 794 | mm |
| H2 – height of test area | 1200 | mm |
| H5 - height of test area including load cell | 1007 | mm |
| B2 – Width | 1094 | mm |
| T3 – Depth | 770 | mm |
| T2 - Depth of base | 553 | mm |
| Weight, approx. | 3200 | kg |
| Test area dimensions | ||
| Test area height without load cell | 1200 | mm |
| Test area depth | 550 | mm |
| Width of clearance between columns | 6264 | mm |
| Machine frame travel, max. | 977.5 | mm |
| Item No. | ||
| Vibrophore 100 including testControl II | 084142 | |
| Optional: Two in one for static tests | 1009579 | |
| Optional: Oscillation displacement measurement | 1001259 | |
- The testing frequency is determined using the stiffness and mass of the test arrangement.
- By activating/deactivating the weights
- Stiffness of the load frame: This value results from a direct measurement of deformation between the crossheads (moving crosshead and base crosshead) and does not take into account the deformation from drives and load cells.
- Without bellows
| Fmax | 250 | kN |
| Mean load, max. | ±250 | kN |
| Force amplitude, max. | ±125 | kN |
| Elastic specimen strain (oscillation displacement) max. | 6 (±3) | mm |
| Testing frequency range1 | 30 ... 285 | Hz |
| Number of frequency steps2 | 8 | |
| Number of guide columns | 4 | |
| Number of lead screws | 2 | |
| Frame stiffness at 1000mm crosshead separation3 | Approx. 380 | kN/mm |
| Drive | ||
| Static tests and for mean force control | AC drive | |
| Min. crosshead speed | 0.0001 | mm/min |
| Max. crosshead speed | 600 | mm/min |
| Crosshead return speed, max. | 1000 | mm/min |
| Positioning repeatability on crosshead | ±2 | µm |
| Motor holding brake | Yes | |
| Dynamic tests | Wear-free electromagnetic drive | |
| Dimensions, load frame | ||
| H4 – height | 2565 | mm |
| H3 – height of clamping table | 794 | mm |
| H2 – height of test area | 1200 | mm |
| H5 – height of test area including load cell | 915 | mm |
| B2 – Width | 1094 | mm |
| T3 – Depth | 770 | mm |
| T2 - Depth of base | 553 | mm |
| Weight, approx. | 3200 | kg |
| Test area dimensions | ||
| Test area height without load cell | 1200 | mm |
| Test area depth | 550 | mm |
| Width of clearance between columns | 6264 | mm |
| Machine frame travel, max. | 925 | mm |
| Item No. | ||
| Vibrophore 250 including testControl II | 1001253 | |
| Optional: Two in one for static tests | 1009581 | |
| Optional: Oscillation displacement measurement | 1001259 | |
- The testing frequency is determined using the stiffness and mass of the test arrangement.
- By activating/deactivating the weights
- Stiffness of the load frame: This value results from a direct measurement of deformation between the crossheads (moving crosshead and base crosshead) and does not take into account the deformation from drives and load cells.
- Without bellows
| Fmax | 500 | kN |
| Mean load, max. | ± 500 | kN |
| Force amplitude, max. | ± 250 | kN |
| Elastic specimen strain (oscillation displacement) max. | 4 (± 2) | mm |
| Testing frequency range1 | 35 ... 285 | Hz |
| Number of frequency steps2 | 8 | |
| Number of guide columns | 4 | |
| Number of lead screws | 2 | |
| Frame stiffness at 1000mm crosshead separation3 | Approx. 960 | kN/mm |
| Drive | ||
| Static tests and for mean force control | AC drive | |
| Min. crosshead speed | 0.0001 | mm/min |
| Max. crosshead speed | 250 | mm/min |
| Crosshead return speed, max. | 1000 | mm/min |
| Positioning repeatability on crosshead | ± 2 | µm |
| Motor holding brake | Yes | |
| Dynamic tests | Wear-free electromagnetic drive | |
| Dimensions, load frame | ||
| H4 – height | 3465 | mm |
| H3 – height of clamping table | 930 | mm |
| H2 – height of test area | 1680 | mm |
| H5 – height of test area including load cell | 1347 | mm |
| B2 – Width | 1220 | mm |
| T2 – Depth | 1369 | mm |
| Weight, approx. | 9000 | kg |
| Test area dimensions | ||
| Test area height without load cell | 1700 | mm |
| Test area depth | 640 | mm |
| Width of clearance between columns | 7804 | mm |
| Machine frame travel, max. | 1700 | mm |
| Item No. | ||
| Vibrophore 500 including testControl II | 1011633 | |
| Optional: Two in one for static tests | 1012275 | |
| Optional: Oscillation displacement measurement | 1012273 | |
- The testing frequency is determined using the stiffness and mass of the test arrangement.
- By activating/deactivating the weights
- Stiffness of the load frame: This value results from a direct measurement of deformation between the crossheads (moving crosshead and base crosshead) and does not take into account the deformation from drives and load cells.
- Without bellows
| Fmax | 600 | kN |
| Mean load, max. | ± 600 | kN |
| Force amplitude, max. | ± 300 | kN |
| Elastic specimen strain (oscillation displacement) max. | 4 (± 2) | mm |
| Testing frequency range1 | 30 ... 265 | Hz |
| Number of frequency steps2 | 8 | |
| Number of guide columns | 4 | |
| Number of lead screws | 2 | |
| Frame stiffness at 1000mm crosshead separation3 | Approx. 880 | kN/mm |
| Drive | ||
| Static tests and for mean force control | AC drive | |
| Min. crosshead speed | 0.0001 | mm/min |
| Max. crosshead speed | 250 | mm/min |
| Crosshead return speed, max. | 1000 | mm/min |
| Positioning repeatability on crosshead | ± 2 | µm |
| Motor holding brake | Yes | |
| Dynamic tests | Wear-free electromagnetic drive | |
| Dimensions, load frame | ||
| H4 – height | 3465 | mm |
| H3 – height of clamping table | 930 | mm |
| H2 – height of test area | 1680 | mm |
| H5 – height of test area including load cell | 1347 | mm |
| B2 – Width | 1220 | mm |
| T2 – Depth | 1369 | mm |
| Weight, approx. | 9000 | kg |
| Test area dimensions | ||
| Test area height without load cell | 1700 | mm |
| Test area depth | 640 | mm |
| Width of clearance between columns | 7804 | mm |
| Machine frame travel, max. | 1700 | mm |
| Item No. | ||
| Vibrophore 600 including testControl II | 1030616 | |
| Optional: Two in one for static tests | 1012275 | |
| Optional: Oscillation displacement measurement | 1012273 | |
- The testing frequency is determined using the stiffness and mass of the test arrangement.
- By activating/deactivating the weights
- Stiffness of the load frame: This value results from a direct measurement of deformation between the crossheads (moving crosshead and base crosshead) and does not take into account the deformation from drives and load cells.
- Without bellows
| Fmax | 1000 | kN |
| Mean load, max. | ±1000 | kN |
| Force amplitude, max. | ±500 | kN |
| Testing frequency range1 | 30 ... 150 | Hz |
| Elastic specimen strain (oscillation displacement) max. | 4 (±2) | mm |
| Number of frequency steps2 | 8 | |
| Number of guide columns | 4 | |
| Number of lead screws | 2 | |
| Frame stiffness at 1000mm crosshead separation3 | Approx. 880 | kN/mm |
| Drive | ||
| Static tests and for mean force control | AC drive | |
| Min. crosshead speed | 0.0001 | mm/min |
| Max. crosshead speed | 250 | mm/min |
| Crosshead return speed, max. | 1000 | mm/min |
| Positioning repeatability on crosshead | ± 2 | µm |
| Motor holding brake | Yes | |
| Dynamic tests | Wear-free electromagnetic drive | |
| Dimensions, load frame | ||
| H4 – height | 4538 | mm |
| H3 – height of clamping table | 1058 | mm |
| H2 – height of test area | 2320 | mm |
| H5 – height of test area including load cell | 2005 | mm |
| B2 – Width | 1620 | mm |
| T2 – Depth | 1445 | mm |
| Weight, approx. | 17500 | kg |
| Test area dimensions | ||
| Test area height without load cell | 2310 | mm |
| Test area depth | 1995 | mm |
| Width of clearance between columns | 9824 | mm |
| Machine frame travel, max. | mm | |
| Item No. | ||
| Optional: Two in one for static tests | 1017257 | |
| Optional: Oscillation displacement measurement | 1012273 | |
- The testing frequency is determined using the stiffness and mass of the test arrangement.
- By activating/deactivating the weights
- Stiffness of the load frame: This value results from a direct measurement of deformation between the crossheads (moving crosshead and base crosshead) and does not take into account the deformation from drives and load cells.
- Without bellows
| testControl II measurement and control electronics | ||
| Control frequency | 10 kHz | |
| Measured-value acquisition | 10 kHz, 24 bits, arithmetical | |
| Slots | 5 x module bus (of which 2 are assigned in the standard configuration) | |
| PC interface | GigaBit Ethernet | |
| Integrated safety concept | 2-channel specification for maximum safety | |
| Interface for interlocked safety doors | ||
| Interface for emergency stop link | ||
| Display-equipped remote control | Set-up or testing mode | |
| <EMERGENCY STOP> button | ||
| Key switch for switching between setup and testing modes | ||
| Dimensions, testControl II measurement and control electronics | ||
| H1 - Height without tabletop | 1000 | mm |
| B1 – Width | 600 | mm |
| T1 – Depth | 600 | mm |
| Weight, approx. | 135 | kg |
| Length of cable between vibrophore & testControl II | 5 | m |
| Accessories | ||
| Universal measurement amplifier (029443 | Either AC or DC supply | |
| Strain gauge, half and full bridge | ||
| 4- and 6-conductor technology | ||
| IO card (029448) | 1 analog ± 10V input (controllable) | |
| 2 analog ± 10 V outputs | ||
| 4 digital inputs, 24 V | ||
| 3 digital outputs, 24 V | ||
| 1 relay output, potential free | ||

testXpert R – our software for dynamic testing
testXpert R is used with servohydraulic testing machines, vibrophores and electrodynamic testing machines. The testing software offers the right test programs for fatigue tests, fracture mechanics, low cycle fatigue (LCF). A graphical block editor is available for free test configurations, where up to 100 blocks can be parameterized.
Downloads
- Product Information: Vibrophore 15 PDF 257 KB
- Product Information: Vibrophore 25 PDF 232 KB
- Product Information: Vibrophore 50 PDF 227 KB
- Product Information: Vibrophore 100 PDF 320 KB
- Product Information: Vibrophore 250 PDF 310 KB
- Product Information: Vibrophore 500 PDF 312 KB
- Product Information: Vibrophore 600 PDF 314 KB
- Product Information: Vibrophore 1000 PDF 325 KB
- Product Information: Load cell Xforce dynamic PDF 314 KB
- Product Brochure: Dynamic and Fatigue Testing Systems PDF 5 MB
Other companies use the Vibrophore
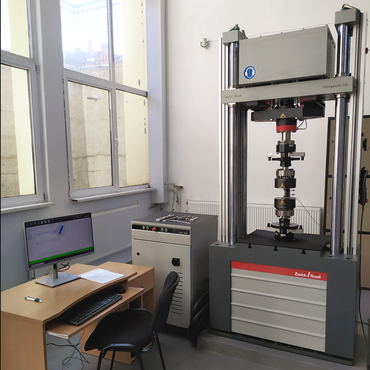
Technical University of Gabrovo – Faculty of Mechanical and Precision Engineering, Bulgaria
FAQ
A vibrophore is an oscillation system that uses a mechanical resonator in connection with an electromagnetic drive. Vibrophores can be used to apply a dynamic load on material specimens.
Vibrophores are used for high cycle fatigue tests in the areas of tensile, compression, pulsating and alternating loads. In addition, fracture mechanics tests are performed on CT (compact tension) and SEB (singe edge bending) specimens.
Vibrophores are used on drive chains, crankshafts, piston rods and timing chains in vehicle motors, on turbine blades or concrete and reinforcing steel.
ZwickRoell vibrophores are available in eight models for resonance fatigue tests up to 1,000 kN. The extremely stiff load frame consists of four columns to achieve excellence in guide qualities. Mechanical clamping of the oscillating crosshead and the implementation of the testXpert III testing software transform the Vibrophore into a true static materials testing machine.
