Vickers tester
Vickers hardness testers are normally categorized as micro, low load or macro hardness testers. The load ranges are more specifically differentiated as follows:
- Macro Vickers hardness tester: Load range above 5 kg for components with low to high hardness.
- Low load Vickers hardness tester: Load range from 0.2 to 5 kg for small parts and thick coatings or materials with low hardness.
- Micro Vickers hardness tester: Load range below 0.2 kg for indentations on thin coatings and hardness determination of individual crystallites or inclusions.
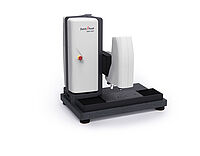
Modern Vickers hardness testing machines like the DuraScan from ZwickRoell cover various load ranges with a single instrument and support standard-compliant tests according to Knoop, Brinell and in some cases even Rockwell.
Our Vickers hardness testers are ideal for use anywhere from simple individual tests to complex and automated test tasks.
Our Vickers hardness testers are especially suited for customers in the metals, automotive, aerospace, and motorsport sectors, as well as for research and laboratory facilities.
Vickers hardness testers overview Operating principle More on Vickers hardness testing Consultation request
Overview of Vickers hardness testing machines and Vickers hardness testers
Our DuraScan Vickers hardness testers are among the closed loop software controlled Vickers hardness testing machines.
Vickers hardness testers that include a tool changing system (turret) like the DuraScan allow for quick changes between different test methods. Vickers hardness testing machines are found in most laboratory environments.
In the development of Vickers hardness testers at ZwickRoell, we particularly focus on the following:
- High precision and durability
- Simple operation that minimizes operational errors
- Future-proof testing software
Comparison of DuraScan versions
| DuraScan 10 Lite | DuraScan 20 Lite | DuraScan 10 | DuraScan 20 | DuraScan 50 | DuraScan 70 | DuraScan 80 | |
 | 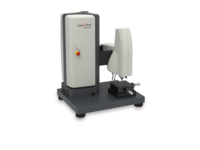 | 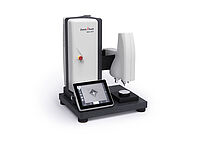 | 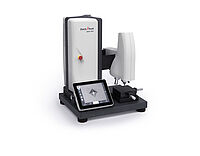 | 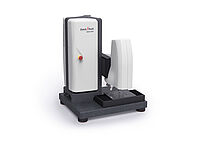 |  |  | |
| Load range | 0.00025 - 62.5 kg | 0.00025 - 62.5 kg | 0.00025 - 62.5 kg | 0.00025 - 62.5 kg | 0.00025 - 62.5 kg | 0.00025 - 62.5 kg | 0.00025 - 62.5 kg |
| Measuring turret | Manual | Manual | Manual | Manual | Motorized | Motorized | Motorized |
| Display | PC with monitor (not included) | PC with monitor (not included) | Display | Display | PC with monitor | PC with monitor | PC with monitor |
| Level of automation | Semi-automatic | Semi-automatic | Semi-automatic | Semi-automatic | Fully automatic | Fully automatic | Fully automatic |
| Software | ecos Workflow Touch | ecos Workflow Touch | ecos Workflow Touch | ecos Workflow Touch | ecos Workflow Pro | ecos Workflow Pro | ecos Workflow Pro |
| Positioning of component | - | Manual cross slide | - | Manual cross slide | Linear table | Linear table | Large linear table |
| Overview camera | - | - | - | - | - | ✓ | ✓ |
What is a Vickers hardness tester?
As the name indicates, a Vickers hardness tester is specialized for hardness testing according to the Vickers method. Many Vickers hardness testers can also cover Brinell and Knoop test methods.
These instruments support standard compliant testing of different materials and component geometries across a wide range of industries. A typical Vickers hardness testing instrument includes a load application feature, an indenter, a test anvil and an optical system. Vickers hardness testers can be manually operated, where the indentation is measured using an ocular device, or they can be software-controlled Vickers hardness testing machines with fully automated evaluation of the test indentation.
With the software-controlled Vickers hardness testing machines you benefit from a wide range of functions including a template function, user-defined specimen grips, a high-resolution camera system and electronically controlled load application. These Vickers hardness testing instruments can be used to create hardness curves (hardness profile measurements) and hardness maps of complete specimens.
ZwickRoell hardness testing instruments for Vickers test according to valid industry standards including ISO 6506, ISO 6507, ISO 4545, ASTM E384, ASTM E92, ASTM E10. Measuring hardness helps designers and manufacturers determine material properties, including after hardening and forming processes, and therefore evaluate how they will behave in their intended application.
How does a Vickers hardness tester work?
A Vickers hardness tester uses a pyramid-shaped diamond as the indenter to create an indentation in the material to be tested. This indentation is then evaluated. Most ZwickRoell Vickers hardness testing machines use a software program to automatically evaluate this indentation. Depending on the level of automation, Vickers hardness testing machines can also be used to test hardness curves. Our accessories portfolio includes different specimen grips, with which a wide variety of specimens, often including embedded specimens, can be gripped and tested according to standard. In addition to the Vickers method, many hardness testing instruments can also test according to Knoop or Brinell, significantly widening their application range for our customers.
FAQ
A Vickers hardness tester uses a pyramid-shaped industrial diamond indenter with an angle of 136 degrees. The pyramid is pressed into the material to be tested, using a specified force. The size of the indentations, or its diagonals, are measured with an optical system to determine the hardness of the material.
The main difference between the two methods is the type of indenter and indentation created. The Rockwell method uses a hardmetal ball or diamond pyramid indenter, while the Vickers method uses a diamond pyramid. In the Rockwell method, the indentation is evaluated based on its depth. The Vickers method evaluates the indentation optically.