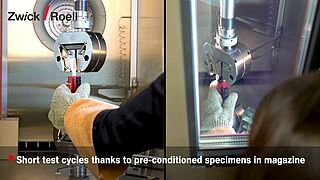
ASTM D638 Tensile Properties of Plastics
The ASTM D638 standard describes the test method for determination of the tensile properties of reinforced and unreinforced plastics. It helps determine essential mechanical properties, including tensile stress, strain, tensile modulus, tensile strength, tensile strength at yield and tensile strength at break.
ASTM D638 contains information about specimen shape and specimen sizes, test procedures including environmental conditions as well as accuracy requirements for the corresponding testing machines and extensometers. The following information provides a comprehensive overview. However, to ensure that the tensile test is carried out in compliance with the ASTM D638 standard, it is essential to reference the full standard.
While ASTM D638 and its ISO counterpart ISO 527-1 / ISO 527-2 are technically equivalent, they do not delivery fully comparable results, since the specimen shapes, the test procedure and determination of the results differ in a few aspects. The plastics tensile test on films and sheets with a thickness of less than 1 mm are described in the ASTM D882 or ISO 527-3 standards.
ISO vs. ASTM Comparison of ASTM standards for tensile testsObjective and characteristic valuesSpecimens & dimensionsRunning a testTest equipmentEnvironmental conditionsAutomationFAQsDownloads
What is the difference between ASTM D638 and ISO 527-1/2?
ASTM D638 and ISO 527-1/2 are two commonly used standards for testing the tensile properties of plastics. While ASTM D638 presents a pragmatic characterization of tensile properties, the guiding principle of the ISO 527 standard is the high level of reproducibility of test results across laboratories, companies and national borders.
Here are some important differences to note when comparing ASTM D638 and ISO 527:
- ISO and ASTM specify and allow the use of different specimen sizes:
ASTM D638 Type I is the preferred specimen for rigid plastics in the shape of a dumbbell with a total length for 165 mm, a thickness of 3.2 mm (1/8 inch) and a gauge length of 50 mm (2 inches), s this is still relatively similar to common component material thicknesses and at the same time supports a good level of strain measurement accuracy.
The preferred dumbbell specimen compliant with ISO 527-2 is Type 1A (injection molded) with a total length of 170 mm, a thickness of 4 mm and a gauge length of 75 or 50 mm. While the ASTM standard describes five specimen types, ISO limits the specimens to two types in order to achieve a high degree of comparative precision. - The test speeds and strain rates specified in the standards may also differ.
- In many cases, ASTM D638 places lower requirements on the accuracy of the strain measurement than ISO 527.
- The environmental conditions specified for the test (such as temperature and humidity) may vary.
- Requirements in terms of data analysis and results determination can differ between the two standards.
Is ASTM D638 the right standard for my test?
In polymer testing, there are different standardized test methods for tensile tests depending on the material and form:
- ASTM D638:tensile testing of unreinforced and short-fiber reinforced plastics. The ASTM D638 standard can be used for a specimen thickness of 1.0 up to 14 mm (0.55 in.).
- ASTM D882: tensile test on plastic film and sheeting material with a thickness of less than 1.0 mm (0.04 in.). For this, there are special specimens and a test method that addresses the particular requirements for testing of film. Materials with a thickness of more than 14 mm (0.55 in.) must be reduced through machining.
- ASTM D412: tensile test on vulcanized rubber and thermoplastic elastomers
- ASTM D1708: tensile test on microtensile specimens
- ASTM D5323: determination of 2% secant modulus for polyethylene geomembranes in tensile testing
- ASTM D2290: apparent hoop tensile strength of plastic pipe
- ASTM D3039: standard test method for tensile properties of polymer matrix composite materials such as GRC or CRC. These materials can have very different properties depending on the direction and structure of the laminate or fabric. They, therefore, often require special specimens and test methods
- ASTM D3916: determining the tensile properties of pultruded, glass-fiber-reinforced plastic rods
- ASTM D7205: test method for tensile properties of fiber-reinforced polymer matrix composite bars
- ASTM D751: tensile test on coated fabrics
- ASTM D1623: test method for tensile and tensile adhesion properties of rigid cellular plastics
- ASTM D3574 Test E: tensile test on foam
- ASTM D897: tensile properties of adhesive bonds
Objective & characteristic values of the tensile test to ASTM D638
In the tensile test according to ASTM D638, various typical characteristic values are determined which describe the essential mechanical properties of a molding compound or a specimen machined from a defined area of a component:
- Tensile stress: force related to the initial cross section of the specimen
- Strain: change in gauge length with reference to the initial gauge-length
- Tensile modulus: gradient of the curve in the stress-strain diagram
- Yield point: stress and strain at the curve plot point at which the gradient is zero
- Point of break: stress and strain at the moment of specimen break
- Poisson's ratio: negative ratio of transverse strain to axial strain
Aging tests
The tensile test to ASTM D638 provides a good basis for demonstrating the change in the mechanical characteristic values of a polymer following aging, heat or media storage, or weathering. Here, the characteristic values of the tensile test are determined in the newly molded state, as well as after defined aging or weathering periods.
ASTM D638 specimen dimensions / specimen types
Specimens used for tests according to ASTM D638 are classified by type:
- ASTM D638 Type I - The preferred test specimen is the dumbbell Type I, which with a thickness of 3.2 mm (1/8 inch) and a gauge length of 50 mm (2 inches) is still relatively similar to common component material thicknesses and at the same time allows for a good level of strain measurement accuracy.
- ASTM D638 Type II - Provided that by using the test specimen Type I a fracture cannot be produced in the narrow parallel part of the specimen, ASTM D638 recommends the use of a test specimen Type II, in which the width of the narrow parallel section is significantly reduced.
- ASTM D638 Type III - If specimens with material thicknesses of more than 7 mm can be obtained through mechanical processing, then specimen Type III is used. Here, the width of the narrow parallel section, as well as the shoulder width and the overall length are increased so that the specimen thickness remains less than the width. For sheet thickness of more than 14 mm, the thickness is adjusted through mechanical processing.
- ASTM D638 Type IV - The test specimen Type IV is ideal for testing of very soft polymers (e.g., rubber) and is used when comparing soft and more stiff polymers.
- ASTM D638 Type V - If only a small amount of material is available, or if machining the specimen from a component does not allow for a larger specimen, then a Type V specimen is used, which is reduced in every dimension relative to Type I.
| Standard | Specimen type | Note | l3 mm | l1 mm | b2 mm | b1 mm | h mm | L0 mm | L mm |
|---|---|---|---|---|---|---|---|---|---|
| ASTM D638 | Type I | Preferred specimen for rigid plastics | ≥165 | 57±0.5 | 19+6.4 | 13±0.5 | 3.2±0.4 | 50±0.25 | 115±5 |
| ASTM D638 | Type II | Preferred when type I does not break in the narrow cross-section | ≥183 | 57±0.5 | 19+6.4 | 6±0.5 | 3.2±0.4 | 50±0.25 | 135±5 |
| ASTM D638 | Type III | For specimen thickness greater than 7mm (rigid and soft plastics) | ≥246 | 57±0.5 | 29+6.4 | 19±0.5 | 7 ... 14 | 50±0.25 | 115±5 |
| ASTM D638 | Type IV | For comparison of rigid and soft plastics | ≥115 | 33±0.5 | 19+6.4 | 6±0.05 | 3.2±0.4 | 25±0.13 | 65±5 |
| ASTM D638 | Type V | Small specimens from components | ≥63.5 | 9.53 | 9.53+3.1 | 3.18±0.5 | 3.2±0.4 | 7.62 | 25.4±5 |
Test procedure to ASTM D638: start testing immediately with testXpert
Performing the test to ASTM D638 with our testXpert testing software:
The tensile test is one of the most frequently performed tests when it comes to mechanical testing of plastics and polymers. The standard-compliant procedure is described in detail in the ASTM D638 standard. Step-by-step instructions eliminate the need to read all of the standard pages and show you how easy it is to perform the test with 100% compliance.
Simple and efficient testing to ASTM D638 also guarantees fast onboarding of new employees:
- All characteristic values and parameters defined in the ASTM D638 standard are already saved in the ASTM D638 standard test program. Standard compliance is guaranteed and you avoid the time consuming task of studying the standard.
- Users are guided through the test step-by-step. The only tasks they see on their screen are those that apply to their specific responsibilities, which is made possible through the user management feature. This ensures fast onboarding for new employees. All users reliably perform the test according to ASTM D638—no step is forgotten.
- Maximum testing efficiency is achieved through the connection of peripheral devices: When the specimen dimensions from the micrometer are sent directly to the testing software, you save time and avoid input errors.
testXpert testing software Running the test in 6 steps with testXpert
Testing machines for ASTM D638
For the performance of tensile tests according to ASTM D638, our universal testing machine series, including the zwickiLine, ProLine and AllroundLine series can be used. The typical testing machine has a nominal load of 10 kN. This allows tensile strengths of just under 250 Mpa to be measured with the type I specimen, which is usually sufficient for unreinforced plastics. Lower forces are adapted by selecting the corresponding load cell. For larger forces, we offer load frames with high nominal loads.
The ASTM D638 standard requires a measurement accuracy of ±1% for the measured value. This requirement is verified with a calibration according to ASTM E4 for the entire measurement range of the load cell. The quality of a force measuring system is therefore particularly defined by the width of the measuring range over which the accuracy can be achieved. ZwickRoell testing machines can achieve the measurement accuracy required in ASTM E4 starting at 1/1000 of their measurement range. This means you can measure the modulus values and tensile stress of many materials with the same test arrangement and without having to reconfigure the arrangement.
Measuring the specimen before testing according to ASTM D638
In addition to the specimen shapes, ASTM D638 also describes the accuracy with which the specimen dimensions must be measured.
- The width of the plastic specimens can be determined using a caliper, a micrometer or a cross-section measuring device
- The thickness of plastic specimens is measure with a micrometer or a cross-section measuring device
- The measuring force is between 5 and 15 N, the measuring surfaces are circular and flat, usually with a diameter of 6.35 mm (6.5 mm). Other contact elements are possible
- The measurement is carried out in the center of the specimen and within the gauge length. Injection-molded specimens are measured within 5 mm of the center of the gauge length.
- A thickness measurement error of 0.1 mm produces and error of 2.5%!
Specimen grips for tests to ASTM D638
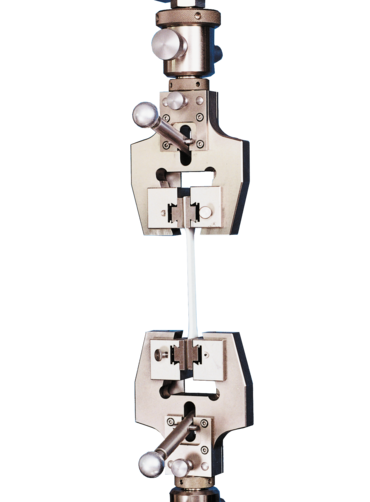
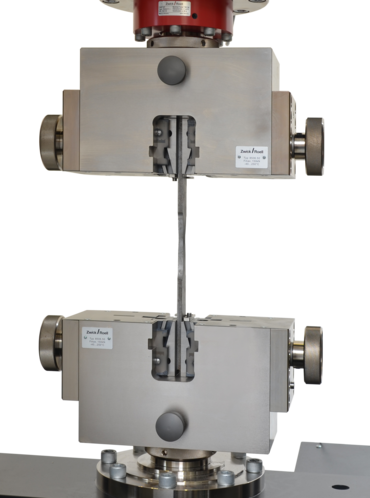
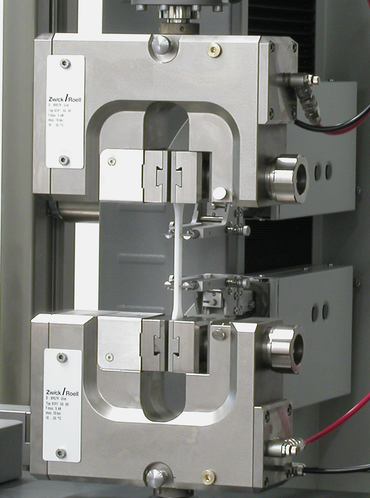
When testing according to ASTM D638, the specimens must be held securely in the tensile tester without slipping, while ensuring that they are not damaged by excessive clamping force.
Different operating principles apply to the specimen grips:
- Close at the touch of a button
- Allow a very direct and slip-free transmission of the crosshead speed into the specimen and thus ensure a very constant and reproducible strain rate during the test
- Precisely adjustable gripping force
- Wide range of applications for soft and hard polymers
- Recommended if high test result reproducibility is required, if very different materials are to be tested or if a large number of tests have to be carried out every day.
- Required in connection with automated specimen feeding
- Manual closing by screwing motion
- Very direct and slip-free transmission of the crosshead speed to the specimen, resulting in very constant and reproducible strain rate during the test
- Wide application range from semi-rigid to rigid plastics
- Suitable for tests with high demands on the reproducibility of test results
- Manual closing via lever movement
- Ideal for very frequent testing
- During the tensile test, the gripping force is applied by the crosshead movement via a wedge effect reducing the strain rate on the specimen, which in turn can have an effect on the test result
- Suitable for internal QA tasks with low requirements for reproducibility with measured values from other laboratories
- Combination of screw and wedge principle; the jaws are applied manually via a screw movement and apply the gripping force during they test via wedge action
- Used when different specimens up to over 30 mm thick need to be tested without changing the wedge jaws
Extensometers for tests to ASTM D638
Values to be measured according to ASTM D638 include the crosshead travel, or the change in clamping distance and the directly measured specimen elongation. For measurement of the crosshead travel, ASTM D638 requires an accuracy of ± 10% relative to the respective measured value. The crosshead travel is especially used for determination of the nominal strain at break, so that the distances to be measured are relatively large.
The tensile modulus is determined with direct measuring extensometers. The permitted error in strain determination is specified at 0.0002 [mm/mm]. This corresponds with a strain error of 0.02% or—at a gauge length of 50 mm—a permitted displacement error of 0.01 mm.
For the measurement of yield points and small elongations up to approximately 20%, ASTM D638 requires compliance with class C according to the calibration standard ASTM E83. For elongations up to 10% this means a set maximum permitted error value in the strain determination of 0.001 [mm/mm], which corresponds to 0.1% elongation. For the measurement of higher elongations, the relative error of the respective measured value may not exceed ± 1%.
For the measurement of elongations higher than 20%, ASTM D638 permits a relative measurement error of ± 20%, which can be achieved even with relatively simple extensometers.
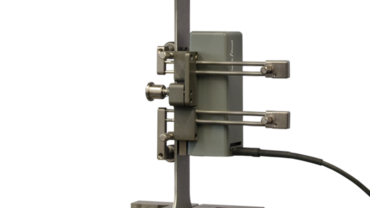
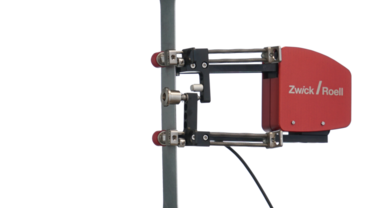

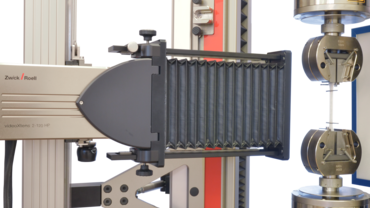
ZwickRoell extensometers for ASTM D638
Depending on your requirements, ZwickRoell offers various extensometers, most of which meet accuracy class B-2 to ASTM E83:
- Non-contact videoXtens for optical non-contact measurement with high resolution and accuracy. The videoXtens has a wide measurement range which reaches >100% from modulus measurement to specimen strains. Attachment onto the specimen is automatic. You have the option of integrating a transverse strain measurement and use temperature control devices.
- makroXtens for mechanical probing measurement with very high resolution and accuracy. The makroXtens has a wide measurement range which reaches >100% from modulus measurement to specimen strains. Attachment onto the specimen is automatic. Measurements can be carried out up to specimen break without removing the sensor arms. You have the option of integrating a transverse strain measurement and use temperature chambers.
- The multiXtens combines the measurement of the tensile modulus with the measurement of high strains up to specimen break. It also has a very large travel range of up to 740 mm. It can be used when testing very different materials, e.g. brittle plastics and elastomers with very large specimen elongations.
- Manually attaching clip-on extensometer for mechanically probing measurement with very high resolution and accuracy. The extensometers are attached to the specimen by the operator before the test and are manually removed again once the maximum measurement displacement has been reached or before the specimen breaks. Depending on the version, you have access to measuring ranges from approx. 2 mm to around 25 mm.
- Mechanical longstroke extensometer for measuring medium to large specimen strains, suitable for elongation at yield and elongation at break. The specimen is attached automatically, and measurement up to specimen break can be carried out without removing the sensor arms.
- Optical longstroke extensometer for measuring medium to large specimen strains by tracking reflective gauge marks, suitable for elongation at yield and elongation at break. Attachment is carried out automatically, as is the measurement of the marker distance; the measurement is carried out until the specimen breaks.
Conditioning and ambient conditions defined in ASTM D638
- Observing defined conditioning and ambient conditions with regard to temperature and humidity is of great importance for the comparability of test results.
- Specifications for the conditioning duration can usually be found in the material standards for the plastic being tested. Furthermore, specimens used in tests on molding materials must be kept in a standard atmosphere (standardized temperature and humidity conditions) for at least 16 hours prior to the test.
- If tests are performed in a standard atmosphere, this refers to a defined normal climate that is specified in ASTM D618.
Temperate atmosphere: 23 ± 2 °C, 50 ± 10 %rh
Subtropical climate: 27 ± 2 °C, 65 ± 10 %rh - The tolerances correspond to class 2. The tolerances are halved for class 1.
- Room temperature usually refers to a somewhat wider temperature range, between 18 °C and 28 °C.
- Tests can also be performed at high or low temperatures, however, different requirements may be specified.
ASTM D638 tensile test at low or elevated temperatures
The standard is the measurement of the specimens in a conditioned state according to method A of ASTM D618. The ASTM D638 standard, however, allows for deviations in conditioning and measurement requirements so that tests can also be performed at low or elevated temperatures according to this standard.
For tensile tests on plastics according to ASTM D638 at low or elevated temperatures, ZwickRoell also provides a temperature chamber. The temperature range can be adjusted from -80 °C bis +360 °C. The fully integrated system ensures efficient, reliable and easy operation during the performance of tensile tests. With the door-in-door solution, nitrogen consumption and ice formation are significantly reduced while testing at cold temperatures, allowing you to run your tests more cost effectively.
More tests in the same time frame: increased specimen throughput in the plastics lab
For tensile tests according to ASTM D638, an automated solution may prove to be worthwhile starting at 10 specimens per day. Our roboTest N testing assistant assumes simple pick-n-place tasks and provides cost-efficient support in the test lab.
For laboratories with high testing requirements, we recommend our robotic testing system roboTest L. Our workhorse for plastics testing in large quantities can accommodate 450 specimens. It autonomously performs the specimen cross-section measurement and tensile tests according to ASTM D638. After the test, separate disposal grippers remove the specimen remains from the specimen grips.
But other specimen shapes or other test methods are also no problem for our automated testing systems. The automated testing system roboTest R is more complex and allows you to connect a second or third testing machine, as well as additional devices such as a centering station or a temperature chamber that ranges from -80 °C to +360 °C. This not only increases specimen throughput, it also offers you the option to perform different tests in parallel for fast and reliable test results.
Frequently asked questions regarding ASTM D638
The most common ASTM standard for tensile tests on plastics is ASTM D638. This standard is used to determine tensile properties of plastic materials for control, specification, qualitative characterization and research and development purposes. It defines the testing equipment, specimen shape and dimensions and the test procedure to be followed. Material properties determined using ASTM D638 include tensile strength, specimen elongation, strain values, the modulus of elasticity, and the option to determine Poisson’s ratio at room temperature.
For more detailed information, please refer to the full standard: ASTM D638
The tensile strength of plastics is essentially determined by measuring the stress that is required to cause a plastic specimen to break or to yield. The standard, therefore, makes a differentiation between the yield point and the break resistance. This defining characteristic of plastic materials is commonly used in research and development and for quality control purposes. The tensile strength of plastics is determined using a tensile testing machine, which pulls the specimen apart until it breaks, while critical values are measured and calculated. Most commonly these tests are performed according to standard ASTM D638, which specifies the shape and dimensions of the specimen to be tested, provides machine specifications, and describes the test procedure.
The ASTM D638 standard describes tensile testing on plastics. It is applied to measure tensile properties including the tensile modulus, yield stress, yield strain, tensile strength and strain at break. These properties are important for the determination and comparison of plastics and plastic compounds, as well as for quality assurance purposes.
For brittle plastics and plastics, which do not exhibit a yield point, strain at break is measured directly with a mechanical or non-contact measuring extensometer. In the case of thermoplastics that do present a yield point, the nominal strain at break is measured from the travel of the testing machine’s pulling grip.
Tensile strength is the highest tensile stress that a specimen can reach during a tensile test. This tensile strength can occur at a yield point, in which case it is referred to as tensile strength at the yield point. If the tensile strength occurs shortly before failure of the specimen, it is referred to as tensile strength at break.
Long fiber reinforced plastics such as GRC or CRC are measured in the tensile test to ASTM D3039. These materials can have very different properties depending on the direction and structure of the laminate or fabric. They, therefore, often require special specimens and test methods.
The ASTM E132 standard specifies a suitable test method to measure Poisson’s ratio at ambient temperature. In the case of unreinforced plastics, however, a fixed value for Poisson’s ratio can usually be used for calculation purposes, since it is largely constant.
The standard is the measurement of the specimens in a conditioned state according to method A of ASTM D618. The ASTM D638 standard, however, allows for deviations in conditioning and measurement requirements so that tests can also be performed at low or elevated temperatures according to this standard.
The ASTM D638 standard covers the determination of tensile properties including the tensile strength of unreinforced and reinforced plastics. Other common standards used to test tensile strength are ASTM E8/ASTM E8M for metals, ASTM D412 for rubber and elastomers, and ASTM D3039 fiber-reinforced composites
